

Check the block before machining starts. Confirm the steel grade and paperwork, then measure length, width, and thickness at more than one point. After that, look at bow, twist, taper, rust, dents, pits, saw marks, and any suspicious lines. What matters is not whether the raw block is simply “bigger than final size.” It has to stay big enough after you clean up the faces and remove the bad areas.
For example, a block may measure 155 mm thick while the finished part only needs 150 mm. That sounds comfortable. But if one face needs 2.5 mm removed and the other needs another 3 mm, the block is already too small. This is why incoming inspection should focus on usable steel, not just nominal size.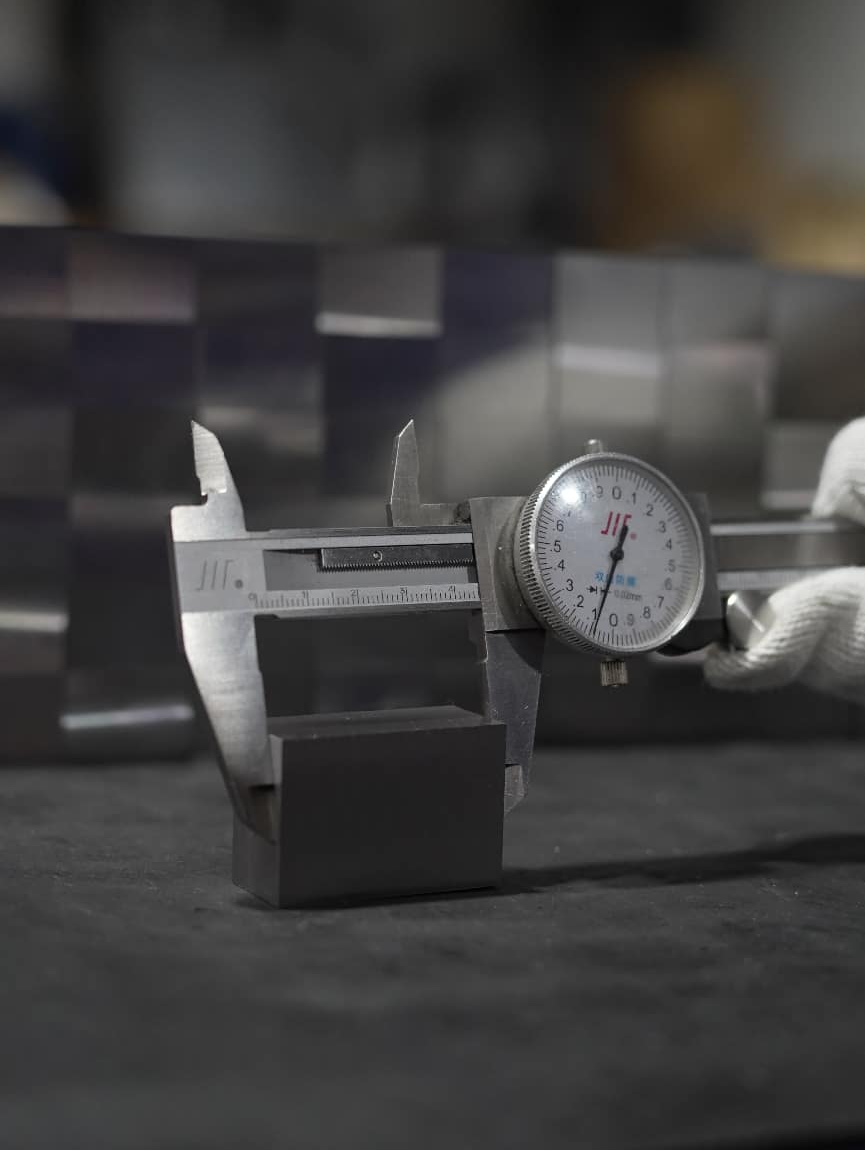
Start With the Order, Not the Caliper
Before touching the block, check what was actually ordered. That means the purchase order, drawing, quotation, order confirmation, or whatever document defines the material.
At minimum, look for:
- steel grade
- length, width, and thickness
- dimensional tolerance
- surface condition
- heat-treatment condition
- machining allowance
- hardness requirement
- material certificate requirement
- UT requirement, if any
- heat number or other traceability requirement
This matters because mold and tool steel is supplied in different conditions. A rough saw-cut block can look ugly and still be perfectly usable. A six-side milled block should be judged differently.
Also, don't assume an order like 800 × 600 × 150 mm tells the whole story. Does 150 mm mean nominal? Minimum? Finished? Rough saw size? Maybe 150 +3/0 mm? Those are not the same thing.
If the order doesn't make that clear, check the quotation and order confirmation before calling the steel undersize.
A few terms are worth keeping straight:
- Nominal size: the basic size used to describe the material.
- Delivered size: what you actually measure.
- Finished size: what the mold part must measure after machining.
- Guaranteed minimum: the smallest size the supplier agreed to deliver.
Confirm the Steel Identity
Find the material marking before cutting or milling removes it. Check the grade, heat number, block number, batch number, and supplier ID if those are part of your traceability system.
Then match that information to the certificate.
Don't rely on paint color. Steel suppliers do not all use the same color code.
If the order is for 1.2738 mold steel, the marking and paperwork should support that. The same goes for P20 / 1.2311, H13 / 1.2344, or any other specified grade.
If one large block is going to be sawn into several smaller pieces, transfer the heat number or other required ID before the original marking disappears. Losing traceability at this stage creates problems later that are completely avoidable.
Look at the Block Before You Clean It
Shipping damage is easiest to prove before the block has been moved, washed, or machined.
Check for broken straps, wet wrapping, damaged pallets, shifted blocks, forklift marks, crushed corners, and dents. Pay extra attention to the bottom and the corners. Water can sit under packaging even when the top of the block looks dry.
Take a few photos if anything looks wrong.
A damaged corner doesn't automatically mean rejection. Say a dent goes 2 mm into the raw edge, but your machining plan removes 6 mm from that exact side. No problem, assuming there is no crack or deeper damage. If only 1 mm is coming off, now you have something to investigate.
Clean Only What You Need to Measure
Don't measure over thick oil, loose rust, chips, scale, or burrs.
This sounds basic, but a small burr can easily move a close reading. A 0.2 mm raised edge can make a block look 0.2 mm thicker than it really is at that point.
Clean the contact areas, then measure on solid, undamaged surfaces. Keep the measuring faces away from chamfers and rolled edges.
If you find a strange line, deep pit, or possible crack, photograph it first. Don't grind away the evidence just to make the surface easier to inspect.
Temperature Matters More Than People Think
For rough stock, temperature is usually not the main issue. For close measurements, though, it can matter.
NIST uses about 11.5 µm/m/°C as a reference thermal-expansion value for steel gauge blocks.[1]
Using that value, a 10°C temperature difference gives roughly:
| Steel Length | Approx. Size Change at 10°C |
|---|---|
| 500 mm | 0.058 mm |
| 1,000 mm | 0.115 mm |
| 1,500 mm | 0.173 mm |
If you have 5 mm of machining stock, a tenth of a millimeter probably isn't deciding the job. If your result is sitting right on the acceptance limit, it's another story.
For example:
- Required minimum: 155.00 mm
- Reading 1: 154.97 mm
- Reading 2: 154.99 mm
- Reading 3: 154.98 mm
Those three readings are consistent, but they're only a few hundredths below the limit. Before rejecting the block, check the tool, the surface, the temperature, and calibration.
If the block measures 152.5 mm against a 155.0 mm minimum, you don't have the same uncertainty problem. That shortage is large enough to be obvious.
Measure Length and Width in More Than One Place
One measurement can hide an angled cut.
For length, measure near both long edges and through the middle. For width, check near both ends and through the middle.
A length check might look like this:
- Side A: 1004.0 mm
- Center: 1002.5 mm
- Side B: 999.0 mm
That's a 5 mm difference from one side to the other. The end is probably angled.
And here's the catch: 999 mm isn't necessarily the usable finished length. You still have to machine the end square, so the final clean length may be smaller.
Width can tell the same kind of story:
- Front: 605.0 mm
- Center: 603.2 mm
- Rear: 601.1 mm
That's not just “three different numbers.” The steady change points to taper.
If the readings start to move in a pattern, keep measuring. You're trying to see the shape of the block, not complete a fixed checklist.
Thickness Usually Deserves the Most Attention
For a medium rectangular block, checking four corners, four edge centers, and the center is a sensible starting point. Nine points isn't a universal standard; it's simply enough to catch many common problems.
Here's a block ordered at 155 mm minimum thickness:
| Position | Thickness |
|---|---|
| Corner 1 | 156.2 mm |
| Corner 2 | 155.8 mm |
| Corner 3 | 154.9 mm |
| Corner 4 | 154.6 mm |
| Long edge 1 | 155.2 mm |
| Long edge 2 | 155.0 mm |
| Short edge 1 | 155.6 mm |
| Short edge 2 | 154.8 mm |
| Center | 155.1 mm |
Maximum thickness is 156.2 mm. Minimum is 154.6 mm. Total spread: 1.6 mm.
If 155.0 mm is the guaranteed minimum, the 154.6 mm area needs to be checked again. Don't average the nine points and say the block is “about 155.2 mm.” That average cannot put steel back into the low corner.
A simple map is even more useful:
| Left | Center | Right | |
|---|---|---|---|
| Front | 155.8 mm | 155.5 mm | 155.0 mm |
| Middle | 155.4 mm | 155.1 mm | 154.8 mm |
| Rear | 155.2 mm | 154.9 mm | 154.6 mm |
Now the pattern is obvious. The block gets thinner toward one corner. That could be taper, twist, or the result of previous machining.
If everything around one point is 155.5 mm and one reading suddenly drops to 154.6 mm, look for a local dent, pit, or bad measurement instead.
Raw Oversize Is Not the Same as Usable Stock
This is where many incoming checks go wrong.
Machining allowance is the material you expect to remove later. It may have to cover saw marks, scale, bow, taper, damaged surfaces, datum creation, finish milling, and grinding.
There is no reliable rule such as “3 mm per side is always enough.” The block size, supplied condition, final tolerance, and process all matter. A fuller example is shown in the mold block machining allowance guide.
Take this case:
- Required finished thickness: 150.0 mm
- Lowest raw thickness: 152.8 mm
- First face needs 1.7 mm removed
- Opposite face needs 1.4 mm removed
The result is:
152.8 − 1.7 − 1.4 = 149.7 mm
The block started 2.8 mm above finished size and still ended up short.
Now another example, because this catches people too: don't add every defect depth separately if the same cut removes more than one problem.
- Raw thickness: 154.8 mm
- Final thickness: 150.0 mm
- Top-face bow cleanup: 1.3 mm
- Pit on that same face: 0.6 mm deep
- Bottom-face cleanup: 1.1 mm
If the 1.3 mm top cut already removes the 0.6 mm pit, the pit doesn't cost another 0.6 mm.
The calculation is simply:
154.8 − 1.3 − 1.1 = 152.4 mm
That still leaves 2.4 mm above the 150.0 mm final size.
The process route matters too. A pre-hardened block may go almost straight into rough and finish machining. An annealed hardenable steel may still need heat treatment and grinding afterward. Those two cases should not use the same stock strategy. See the pre-hardened versus annealed mold steel comparison for the practical differences.
Think in Terms of the Final Usable Block
Instead of asking “Is the raw block big enough?” ask “What is the biggest clean block I can still make from it?”
For example:
- Raw block: 1000 × 800 × 205 mm
- Required finished block: 990 × 790 × 200 mm
- Lowest raw thickness: 203.4 mm
- Top-face cleanup: 1.5 mm
- Bottom-face cleanup: 1.2 mm
Estimated finished thickness:
203.4 − 1.5 − 1.2 = 200.7 mm
So there is only 0.7 mm left above the final requirement. One extra defect deeper than 0.7 mm at the controlling point could change the decision.
This is why dimensions, bow, taper, twist, and surface damage have to be looked at together.
Flatness, Bow, Twist, and Taper Are Not the Same Thing
These terms get mixed up all the time.
- Bow: the block curves along its length or width.
- Hollow: the middle sits lower than the surrounding area.
- Twist: opposite corners sit at different heights.
- Taper: the block gradually becomes thicker or thinner from one side to another.
- Flatness: the shape of one surface by itself.
ISO 1101:2017 gives the general rules and symbols for geometrical tolerancing, including form and orientation controls.[2]
One useful thing to remember: a face can be flat and still not be parallel to the opposite face. The difference is explained more fully in this flatness versus parallelism article.
A Straightedge Is Good for a Quick Reality Check
For ordinary receiving inspection, a precision straightedge and feeler gauges are still very useful.
Check along the length, width, and both diagonals. On a large face, move the straightedge to a few parallel positions instead of checking only the centerline.
Say a 1,000 mm straightedge shows a largest gap of 0.70 mm.
Write:
“Maximum observed straightedge gap approximately 0.70 mm along the long centerline.”
That's better than writing “flatness = 0.70 mm.” A straightedge only tells you what happened along that line.
Also note where the gap is. A 0.70 mm dip over 100 mm is not the same shape as a smooth 0.70 mm bow over a full meter.
Twist Often Shows Up in the Corners
A diagonal check can expose a twist that isn't obvious when you only measure lengthwise.
For example:
| Corner | Relative Reading |
|---|---|
| A | 0.00 mm |
| B | +0.08 mm |
| C | +0.82 mm |
| D | +0.91 mm |
Don't call the 0.91 mm spread “flatness” straight away. What the pattern really tells you is that one pair of corners is sitting much higher than the other in that setup.
That may be twist. It could also be tilt or a support problem, so check the support before making a final call.
If the block is small enough to sit safely on a suitable reference surface, see whether it rocks. First clean underneath it. A chip or burr can fool you very easily.
An Indicator Gives More Detail, but You Still Need to Interpret It
A dial or digital indicator is useful when you want a better picture of the high and low areas.
Here's a simple five-point example:
| Position | Relative Height |
|---|---|
| Left edge | +0.05 mm |
| Front edge | +0.10 mm |
| Center | +0.40 mm |
| Rear edge | +0.08 mm |
| Right edge | 0.00 mm |
The center is roughly 0.3–0.4 mm higher than most of the surrounding points. That's useful information. But it's a relative height map from that setup, not automatically a formal flatness result.
Here's why. If the top face is flat but the block measures 154 mm thick on one side and 153 mm on the other, an indicator referenced from the bottom may show about 1 mm of change. The top can still be flat; the block may simply be tapered.
Long Blocks Also Need Straightness and Squareness Checks
Long blocks can bow along the length or sideways. Check the long edges and side faces, and be consistent about how the block is supported.
Squareness matters too, especially when there isn't much extra stock.
Say you have:
- Raw length: 1,010 mm
- Finished length: 1,000 mm
- First angled end needs about 6 mm removed to square it
That leaves:
1,010 − 6 − 1,000 = 4 mm
for the opposite end.
If the opposite end needs 5 mm removed, you've already lost the finished size.
Also, don't count the same stock twice. If squaring an end also removes its deep saw marks, that may be one machining operation, not two separate allowances.
The six-side mold block machining process shows how reference faces are normally built before precision CNC work.
Surface Defects Are Easier to Judge if You Sort Them First
When you inspect the faces, ends, edges, and corners, it helps to put what you see into three groups.
- Cosmetic: likely to disappear during normal machining.
- Stock-consuming: needs extra material removed.
- Possible material defect: may continue below the surface and needs further investigation.
For anything that consumes stock, record four things: depth, size, location, and how much machining stock is available there.
Rust and Pits
Rust color alone doesn't tell you much. Photograph it first, remove the loose corrosion carefully, and then see whether there is an actual depression in the steel.
For example:
- Planned face cleanup: 2.0 mm
- Deepest pit: 1.6 mm
That leaves only:
2.0 − 1.6 = 0.4 mm
of margin at that point.
If the face is also bowed, that 0.4 mm can disappear quickly.
Location matters as much as depth. A small pit on the back of a support block may not matter. Put the same pit on a cavity, shut-off, guide surface, or polished face and the decision can change.
For high-polish applications using a grade such as 1.2083 stainless mold steel, any defect that remains on the final cavity surface deserves a closer look.
Dents and Corner Damage
A dent often has two parts: a low area and a raised lip. Don't measure thickness on the lip. You'll get an artificially high number.
Here's a simple example:
- Dent reaches 2.2 mm inward from the raw edge
- Actual machining removes 4.5 mm from that edge
The dent should disappear if there is no deeper damage.
Now change the numbers:
- Corner damage reaches 5.5 mm inward
- Planned edge removal is 3.0 mm
About 2.5 mm of the damaged area may remain.
That doesn't automatically mean rejection, but it definitely needs review against the final part position.
Saw Marks
Rough saw-cut steel is supposed to have saw marks. The problem is the deepest valley, not whether the face looks rough.
For example:
- Planned cleanup: 0.8 mm
- Deepest saw valley: 1.2 mm
You need about another:
1.2 − 0.8 = 0.4 mm
of removal to clean that point completely.
If that extra 0.4 mm pushes the block below final size, the problem is real.
Don't Assume the Finished Part Sits in the Middle
This is another common shortcut that can give the wrong answer.
Say the raw width is 520 mm and the finished width is 500 mm. That's 20 mm of extra steel in total.
It's tempting to say “10 mm per side.” But after datum selection, the actual layout might be:
- Side A: remove 7 mm
- Side B: remove 13 mm
Now imagine a defect 8 mm from Side A. It would still be inside the finished part.
So when you're judging a local defect, use the real final part position, not a centered assumption.
Crack-Like Lines Need a Different Response
A visible line could be a scratch, grinding mark, seam, lap, or crack. Don't grind it away before documenting it.
If more testing is needed, the method depends on what you're trying to find.
Liquid penetrant testing is used to reveal discontinuities that are open to the surface in suitable solid, nonporous materials.[3]
Magnetic particle testing is used on ferromagnetic materials for surface and near-surface discontinuities.[4]
Ultrasonic testing uses high-frequency sound and can be used to find internal discontinuities that aren't visible from the outside.[5]
Finding an indication is only one part of the job. You still need an acceptance requirement to decide whether it passes.
Scale and Decarburization Are Different Problems
Loose scale can hide the true surface and interfere with measurement.
Decarburization is different. It is a change in the carbon content of the surface layer after high-temperature exposure, and you can't reliably judge it just by looking at the steel.
ASTM A681-24 covers wrought alloy tool steels within its scope and includes requirements related to chemical composition, hardness, macrostructure, and decarburization.[6]
That doesn't make ASTM A681 a universal rule for every mold steel block. Use it only when the material and order actually fall under that specification.
Check Hardness if the Order Requires It
For pre-hardened mold steel, hardness may be part of incoming inspection.
Before testing, check the method, surface condition, instrument calibration, and test location.
Suppose the required range is 30–34 HRC and you get:
- 31.5 HRC
- 32.0 HRC
- 31.8 HRC
- 41.0 HRC
The first three readings agree fairly well. The 41.0 HRC reading doesn't fit the pattern.
Retest before rejecting the block. Clean or prepare the surface again, check the instrument, and measure nearby.
Also, don't assume every portable hardness tester that displays HRC is performing a true Rockwell C test. ISO 6508-1:2023 covers Rockwell testing and applies to both stationary and portable Rockwell machines.[7]
The method matters more than whether the instrument is portable.
Read the Certificate and UT Report, Don't Just File Them
Check the items required by the order. Depending on the material, that may include:
- grade
- heat number
- chemical composition
- delivery condition
- hardness
- referenced standard
- traceability
If UT was required, check the inspection standard, acceptance level, block ID, heat number, dimensions, coverage, and result.
For steel forgings, ASTM A388/A388M-26 covers pulse-echo ultrasonic examination of steel forgings.[8]
Don't automatically apply ASTM A388 to rolled plate or another product form unless that's the agreed requirement.
And don't read “UT pass” as “zero internal defects.” It means no indication exceeded the applicable acceptance limit within the stated method, coverage, and sensitivity.
Write Down Exactly What You Found
“Pit near center” isn't very useful.
“Pit on Face C, 135 mm from Edge A and 220 mm from Edge B” is.
On large blocks, label the six faces A through F. For anything important, take one full-block photo, one medium shot showing the location, and one close-up.
Use photos to show condition and location. Use proper measuring tools to prove depth and size.
For important measurements, also record the tool used: caliper ID, micrometer ID, indicator ID, straightedge, surface plate, or hardness tester.
If a supplier claim is based on only 0.03 mm, those details matter a lot.
For example, repeated readings of:
- 154.62 mm
- 154.64 mm
- 154.63 mm
against a contractual minimum of 155.00 mm are much stronger evidence than a single note saying “about 154.6 mm.”
Use the Numbers to Decide What Happens Next
| Status | Typical Meaning |
|---|---|
| Accept | The block meets the agreed requirements and can produce the finished part. |
| Accept with Note | A minor condition is recorded but will not affect the finished part. |
| Hold | More measurement, documents, testing, or supplier review is needed. |
| Reject | A confirmed problem prevents the block from meeting the agreed requirement. |
When in doubt, hold the block before machining rather than trying to solve the argument after several hours of CNC work.
A nonconforming block can sometimes still be used under an approved exception. Maybe a damaged area sits completely outside the finished part. That's a technical decision, though, and it should be recorded.
A Few Numbers Can Make the Decision Much Clearer
| What You Found | Example | What It Means |
|---|---|---|
| Thickness spread | 156.2 to 154.6 mm | 1.6 mm variation; check for taper, twist, or a low area. |
| Straightedge gap | 0.70 mm over a 1,000 mm line | There is visible surface deviation along that line. |
| Corrosion pit | 1.6 mm pit with 2.0 mm cleanup stock | Only 0.4 mm cleanup margin remains. |
| Saw groove | 1.2 mm groove with 0.8 mm planned cleanup | About 0.4 mm more steel must be removed. |
| Raw thickness | 152.8 mm for a 150.0 mm finished part | Only 2.8 mm total stock exists. |
| Required face cleanup | 1.7 mm + 1.4 mm | Finished result becomes 149.7 mm, so the block is too small. |
Don't Machine Away the Evidence
If a block is in dispute, stop unnecessary machining until you've recorded the condition.
Once you rough-machine it, the original dimensions are gone, surface defects may disappear, and the supplier may no longer be able to inspect what was originally delivered.
Use numbers when you report the problem.
Instead of:
“The steel is badly warped.”
write:
“Maximum observed gap under a 1,000 mm straightedge was approximately 1.4 mm along the long centerline.”
Instead of:
“The block is too thin.”
write:
“The order requires 155.0 mm minimum. Repeated readings at the lowest location were 154.62, 154.64, and 154.63 mm.”
Some Problems Only Show Up After Rough Machining
Incoming inspection cannot reveal everything inside a block.
If rough machining exposes an inclusion, porosity, internal seam, crack-like line, or unusual separation, stop cutting around that area unless there is a good reason to continue.
Record the machining depth, defect location, visible size, block number, and heat number. Take photos while the evidence is still there.
The part may also move after a large amount of stock is removed.
Example:
- Raw thickness before roughing: 205.0 mm
- Thickness after roughing: 201.8 mm
- End-to-end height difference after unclamping and temperature stabilization: 0.35 mm
That 0.35 mm change doesn't automatically prove the steel is defective. Clamping, temperature, machining sequence, and residual stress can all affect the result.
It does tell you one thing: measure again before finish machining.
The basic steps before CNC work are covered in this steel block preparation guide.
Heavy Blocks Need a Safe Inspection Setup
Large mold blocks can weigh hundreds or thousands of kilograms. Don't move or rotate one just because a checklist says you need to inspect the bottom face.
OSHA requires workers to stay clear of suspended loads and requires slings to be used within their rated capacity.[9]
Never put your hands under a suspended block. If a face can't be inspected safely now, inspect it later when the block is properly supported.
A Simple Inspection Record Is Enough
| Item | Requirement | Actual Result | Status |
|---|---|---|---|
| Steel grade | 1.2738 | 1.2738 | Pass |
| Heat number | Required | H260418 | Pass |
| Length | ≥ 805 mm | 806.2 mm min. | Pass |
| Width | ≥ 605 mm | 605.4 mm min. | Pass |
| Thickness | ≥ 155 mm | 154.7 mm min. | Hold |
| Straightedge check | Agreed requirement | 0.6 mm max. observed gap | Review |
| Rust | No harmful deep pitting | Light surface oxidation | Pass |
| Hardness | 30–34 HRC | 31.2–32.0 HRC | Pass |
| Certificate | Required | Received and matched | Pass |
| UT report | Required | Received | Pass |
Write down what you actually measured. If you used a straightedge and feeler gauge, call it an observed straightedge gap. Don't turn it into a formal flatness value unless your inspection method supports that claim.
Final Checklist
- Steel grade matches the order.
- Heat number and traceability are recorded.
- Required certificates match the delivered steel.
- Length is sufficient after end cleanup.
- Width is sufficient after side cleanup.
- Thickness is sufficient at the lowest critical area.
- Machining stock covers surface and geometry correction.
- Bow, twist, taper, and rocking have been checked where relevant.
- Rust and pits can be removed without going below final size.
- Dents and damaged corners have been compared with the final part position.
- Deep saw marks have enough cleanup stock.
- Suspicious crack-like lines have been investigated.
- Hardness has been checked when required.
- Required UT records have been reviewed.
- Important defects have been photographed and located.
- Borderline dimensions have been measured again with suitable equipment.
- Disputed steel is held before unnecessary machining starts.
Conclusion
A useful receiving inspection should leave you with numbers, not guesses. A nine-point check can show a 1.2–1.6 mm thickness change that one center measurement would miss. A 152.8 mm block also cannot make a 150.0 mm finished part if both faces need 3.1 mm of total cleanup. Use the same thinking for rust, dents, saw marks, bow, and twist: measure what is there, work out how much steel must come off, and compare the result with the finished size. If the margin is small, measure again before machining or rejecting the block.